When There's Always Something to Worry About, Try A Little Bread
What me worry? I’ve got Pam (and a fun bread recipe)!
It doesn’t seem to end, does it? All this intensity. Global temperature is rising in a way that’s caught even our attention. Indictments whirl off the newsfeed, one after another. Worldwide, democracy teeters at the brink. We just survived a pandemic … but why doesn’t it feel like anything’s healed? Instead, it all festers.
Right here, in my gut.
It’s better than it once was for me because I get to be me and to know who the real me is. But it’s hard not to worry that the world will crumble just as I was invited to the party.
It piles up, worry. There’s always something to worry about. What about just getting to live? To sink my hands into it and feel, really FEEL!
I’m finding that’s why I bake. I need to worry something—as in the alternate meaning of “worry”: to wring, tear, gnaw at, to knead reality into something I can feel.
I take solace in bread. Unlike pastry dough, bread demands that I come to grips with it, to grapple, pound, wrench, stretch, break, crush, and dig it. That’s a remedy for me, a way to worry away all these things to worry about.
I’m no master at bread. I don’t have to be. I just have to be there with it. Bread will always be a work in progress for me because … it's bread. Invent a better mousetrap? Hey, try to bake bread to perfection if you want a challenge. I've several bread recipes that I count on to deliver a good loaf. This one is basic, homey, honest-to-goodness hearty … bread. F*ck you, things to worry about.
'Nuff said.
B*tch Bread
Prep Time: 30 min prep, 3.5-4.5 hr total proving Cook Time: 10-15 min Total Time: 3.25 - 4.25 hrs Servings: Yield: 12 Source: B*tch Bakes
EQUIPMENT
Baking Scale
Sifter
Large Bowl
Stand Mixer w/ Bowl & Dough-Hook attachment (optional)
Scotch Blade (plastic or metal scraper to help with working the dough)
Proving Container
Plastic Proving Bag
Standard Loaf Tin
Parchment Paper
Toothpick/Skewer (optional)
INGREDIENTS
3⅔C (500g) strong white bread flour, plus extra for dusting
2¼t (7g) instant dried yeast
½-1C (40-80g) sourdough starter, also known as a "levaine" (optional)
1⅛t (7g) fine salt
scant ¼C (40g) caster sugar
scant 3T (40g) unsalted butter, grated or softened & cut into small pieces,
1T Olive Oil, plus extra for oiling proving container
⅔C (160 ml) milk, whole
⅔C (160 ml) cold water
Cooking Spray (optional)
Instructions
DOUGH & 1ST PROVE
1a. Sift flour into large bowl (or bowl of stand mixer). Add yeast (plus optional sourdough starter/levain) to one side and salt & sugar to the other.
1b. In separate vessel, combine milk and water.
1c. Add butter, olive oil, and ¾ of water to bread dough bowl.
1d. Mix with fingers, gradually adding more water, till you pick up all flour from bowl sides. (Depending on your climate and conditions of the day, you may use less, full amount, or more water to get a soft—but NOT soggy dough.)
[Alternatively, mix at med-low speed (4 on KitchenAid), adding more of the milk/water combo as needed. Knead dough in mixer for 5-7 minutes, till dough starts slapping sides of mixer bowl, or dough is at windowpane stage (see below).]
2a. [Not needed if using stand mixer.] Tip dough onto lightly floured workspace and knead 5–10 minutes. As you knead, dough will move from sticky to smooth and silky.
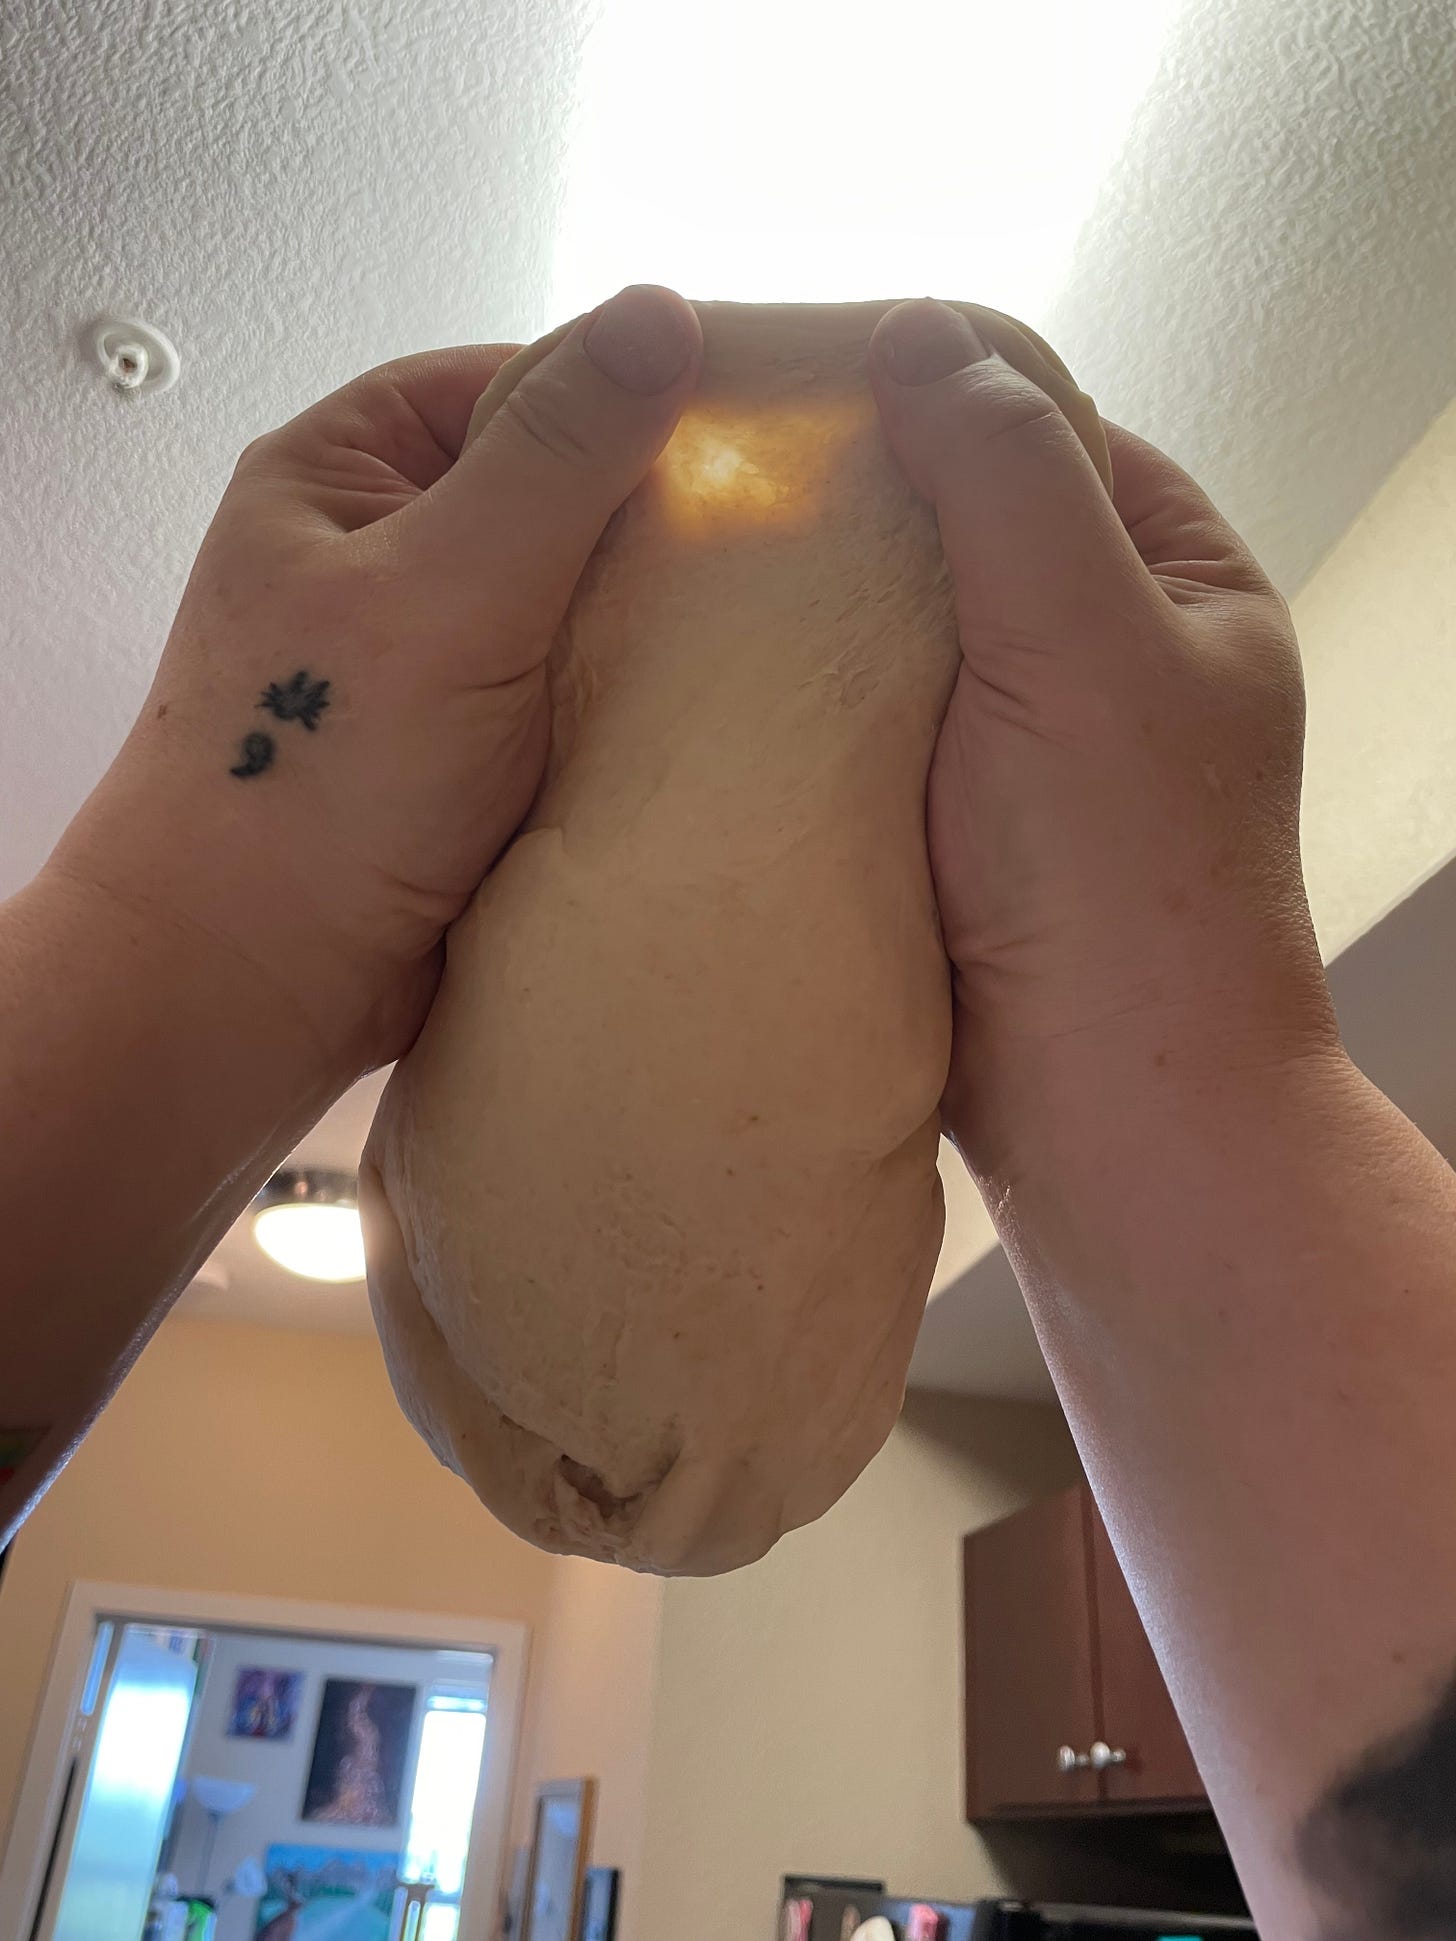
(Baking B*tch Tip #1: Do the windowpane test with the dough: if you can stretch it between your fingers till you see light through it, without it tearing, then you’ve properly kneaded.)
2b. Put dough in oiled proving container or lightly oiled bowl, place bowl in plastic proving bag, or cover bowl with tea towel. Prove 2-3 hrs, till double in size.
(Baking B*tch Tip #2: If you don’t have a proving drawer, but you do have an over-the-stove microwave with a stove light nestled under it, turn on the light over the stove. Close covered dough bowl in microwave. The warmth of the bulb and the sealed microwave interior creates an ideal proving environment. I do this for all my yeast-based doughs.)
2c. While dough proves, oil/grease/spray loaf tin and line with parchment paper. Set aside.
SHAPING & 2ND PROVE
3. Tip dough onto lightly floured workspace. Fold inwards repeatedly till all air is knocked out.
4. Form dough into loaf shape, with seam down. Place in greased/lined loaf tin.
5. Cover loaf tin with plastic bag and prove 1-1.5hrs.
6. 10-15 min before end of prove, preheat oven to 425°F/220°C (450°F/230°C high altitude).
7. Remove tin from plastic bag and place in oven.
13. Bake 23-25 min, till risen and mystically golden brown. (You can poke bread with a toothpick/skewer to test doneness, if you're not sure. If pokey thingie comes out with gunk on it, ze bread ees not done.)
14. After removing from oven, cool 5 min. Transfer bread from tin to wire rack to finish cooling.
Note: Don't store your bread in the fridge. This loaf should last 7-10 days in a bread box/container. Freezes well for up to 3 months.


